Build and Run with Clang
Glossary terms: Benchmark, Experiment, System
In this example, we show how to replicate an experiment, that is to run the same application on a potentially different machine that has the same hardware but possibly a different software stack (for example, a system with the same hardware specs, but software stack is managed by a different organization). We think of a different software stack as one containing different compiler or library versions, though the underlying hardware remains the same. Replicating an experiment can also encompass re-running on the same system (System1) with changes to the software stack, such as a newer library version. In this case, the application’s performance is expected to be similar, but not necessarily as close as with a repeat run.
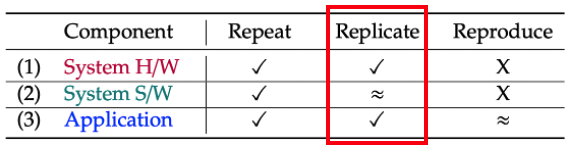
This use case follows the same workflow as Build and Run an Experiment, but changes
the tutorial system’s compiler from its default gcc stack to clang.
What Changes in This Run
The default fluxtainer-aws compiler is gcc. To build the same HPL experiment
with Clang, initialize a second system instance and select the compiler=clang
variant:
~/benchpark]$ benchpark system init --dest=hpc-tutorial-clang fluxtainer-aws compiler=clang

Here compiler=clang is a Benchpark system variant provided by fluxtainer-aws. It
is not a Spack %clang constraint.
Build and Run HPL
Initialize the HPL experiment against the Clang system instance:
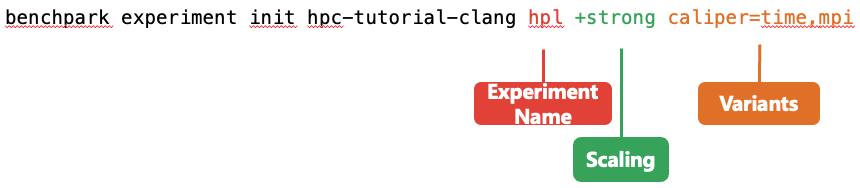
~/benchpark]$ benchpark experiment init hpc-tutorial-clang hpl +strong caliper=time,mpi
Create the experiment workspace:
~/benchpark]$ benchpark setup hpc-tutorial-clang/hpl wkp
Activate Benchpark’s Spack and Ramble environments:
~/benchpark]$ . wkp/setup.sh
Set up the Ramble workspace to build HPL and generate each experiment instance:
~/benchpark]$ ramble --workspace-dir wkp/hpc-tutorial-clang/hpl/workspace workspace setup
Then, run the experiments:
~/benchpark]$ ramble --workspace-dir wkp/hpc-tutorial-clang/hpl/workspace on
The generated workspace is separate from the default GCC run because the system instance
is named hpc-tutorial-clang. That keeps the Clang build, run scripts, and results
side by side with the original hpc-tutorial workspace.
Analyze Strong Scaling
The default stacked area chart shows the exclusive average time per rank for each instrumented region. The x-axis records the node and MPI-rank counts varied in the strong-scaling study.
~/benchpark]$ benchpark analyze --workspace-dir wkp/hpl-tutorial-clang/hpl/workspace
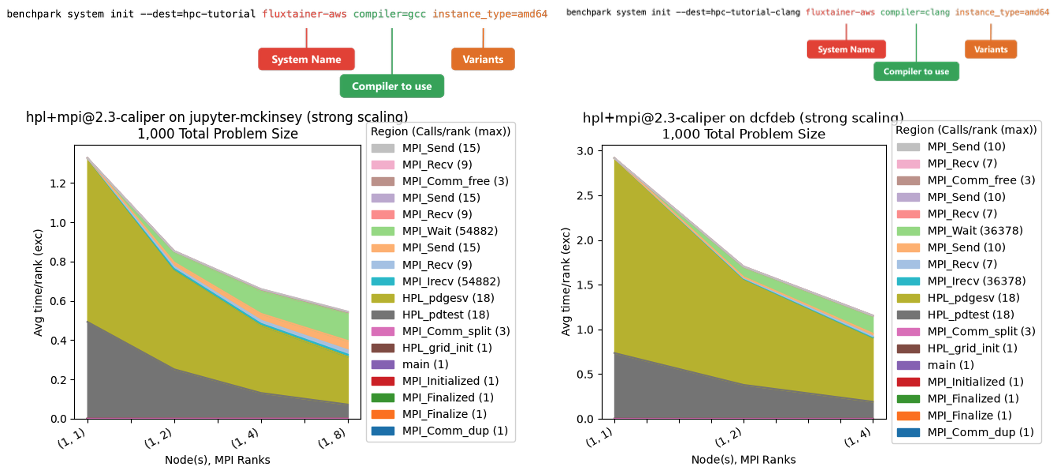
Left figures show the benchpark system specification and strong-scaling area chart for HPL built with gcc in tutorial #2. Right figures show the benchpark system specification and strong-scaling area chart for HPL built with clang.